
Are you looking to add style and storage to your space without spending a fortune? Making your own wall shelf unit is easier than you think.
Imagine having a custom shelf that fits perfectly in your room, holds your favorite items, and shows off your personal touch. In this guide, you’ll discover simple steps and tips that anyone can follow, even if you’ve never built anything before.
Ready to transform your walls and organize your life? Let’s get started!

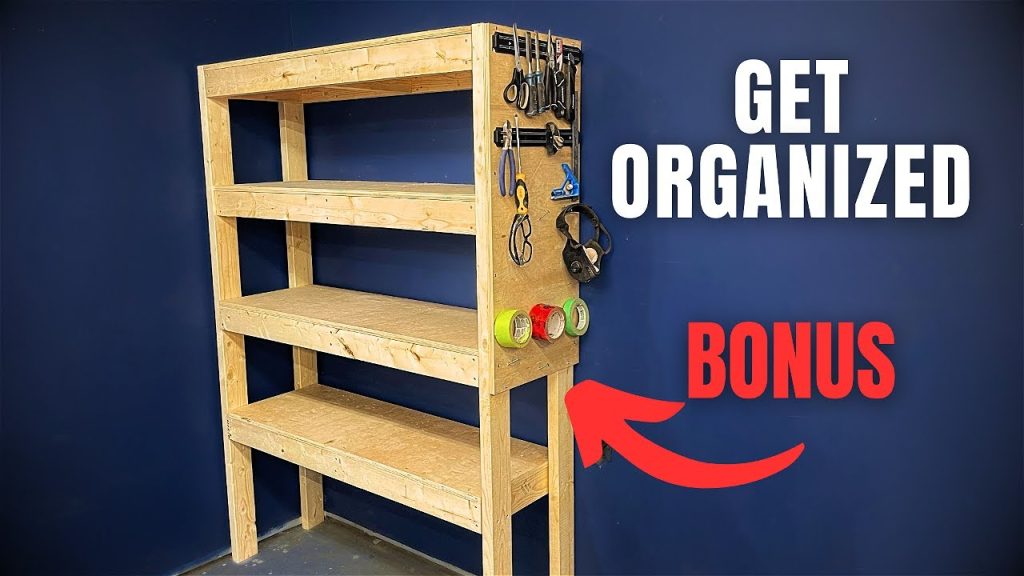
Credit: www.youtube.com
Choosing The Right Materials
Choosing the right materials is key to building a strong wall shelf unit. The materials affect the shelf’s durability, look, and ease of installation. Picking suitable wood, tools, and mounting hardware ensures the project goes smoothly and the shelf lasts long.
Careful material choice also makes the shelf safe to hold items without sagging or falling. This section helps you select the best materials for your shelf unit based on your needs and skills.
Selecting Wood Types
Wood choice affects the shelf’s strength and style. Common wood types include pine, oak, and plywood. Pine is soft, easy to cut, and affordable. Oak is hard, durable, and looks classic. Plywood is stable and less likely to warp.
Consider the shelf’s weight capacity and appearance. Choose wood that matches your room’s decor and budget.
Picking The Right Tools
Having the right tools makes building faster and safer. Basic tools include a saw, drill, screwdriver, and measuring tape. A level helps keep shelves straight. Sandpaper smooths rough edges.
Power tools speed up work but hand tools work well too. Use tools that fit your skill level and project size.
Considering Wall Mounting Hardware
Strong mounting hardware keeps the shelf secure on the wall. Common options are brackets, anchors, and screws. Choose hardware based on wall type—drywall, concrete, or wood studs.
Use anchors for drywall to prevent damage. Heavy items need metal brackets or studs for support. Always check weight limits for safety.
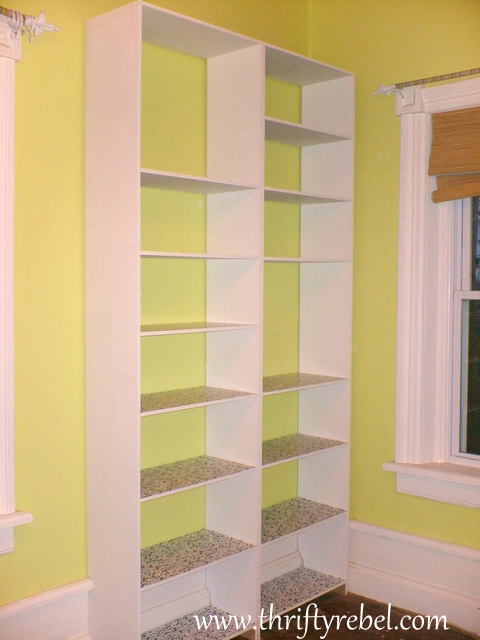
Credit: colormethrifty.com
Planning Your Shelf Design
Planning your shelf design sets the foundation for a successful wall shelf unit. Taking time to measure, decide dimensions, and sketch your layout helps avoid costly mistakes and ensures the shelf fits perfectly in your space. Thoughtful planning also makes the building process smoother and more enjoyable.
Measuring Wall Space
Start by measuring the exact area where you want to install the shelf unit. Use a tape measure and note the width, height, and depth available.
Check for any obstacles like light switches, power outlets, or vents that could interfere with the shelves. Mark these spots clearly on your measurements.
Ask yourself: How much of this wall space do you really want to use? Sometimes less is more, especially in small rooms.
Deciding Shelf Dimensions
Think about what you plan to put on your shelves. Books, plants, or decorative items all need different depths and heights.
Standard shelf depth ranges from 8 to 12 inches, but wider shelves may sag without extra support. Keep this in mind to prevent future damage.
Also, decide the spacing between shelves based on the tallest items you want to display. Adjustable shelves are a flexible option if your needs change.
Sketching The Layout
Draw a simple sketch of your shelf design on graph paper or a digital tool. Include exact measurements and spacing you planned.
Visualizing the layout helps spot design flaws early. It also gives you a clear guide when cutting wood or assembling parts.
Try different configurations: staggered shelves, uniform rows, or a mix. Which arrangement looks best and suits your style?
Cutting And Preparing Wood
Choose quality wood and measure carefully to fit your shelf design. Cut each piece straight and smooth the edges for a clean finish. Preparing wood correctly ensures a sturdy, attractive wall shelf unit.
Cutting and preparing wood is a crucial part of building a wall shelf unit. This process lays the foundation for your project, ensuring that each piece of wood fits perfectly and contributes to a sturdy, attractive shelf. By focusing on precision and safety, you can transform raw wood into beautifully cut components ready for assembly.Marking Cut Lines
Begin by measuring each piece of wood accurately. Use a tape measure and pencil to mark the dimensions clearly. Double-check your measurements; this will save you from costly mistakes later. Consider using a square to ensure your lines are straight and true. This tool helps align your cuts, maintaining a professional look. If you have a specific design, sketch it out to visualize the layout before cutting.Using Saws Safely
Safety should always be your top priority when using saws. Wear protective goggles and gloves to guard against debris and sharp edges. Position your wood securely before cutting to prevent accidents. Choose the right saw for the job. A circular saw works well for straight cuts, while a jigsaw is perfect for curves. Always be mindful of your fingers and ensure the blade is sharp to avoid unnecessary force.Sanding And Smoothing Edges
Once your pieces are cut, sanding is essential for a smooth finish. Use sandpaper with a medium grit to smooth out rough edges. This step not only enhances the look but also reduces the risk of splinters. Consider using a power sander for larger surfaces. After smoothing, wipe the wood with a damp cloth to remove dust. This prepares the surface for staining or painting, making your shelf unit visually appealing. By following these steps, you ensure that your wall shelf unit is both functional and stylish. What challenges have you faced in your woodworking projects, and how have you overcome them?Assembling The Shelf Frame
Assembling the shelf frame is where your wall shelf unit starts to take shape. This part requires careful attention to how each piece fits together, ensuring that the structure will be both functional and sturdy. Your focus should be on creating solid connections that can support the weight of items you’ll place on the shelves.
Joining Pieces Together
First, lay out all the wood pieces according to your design. Align edges carefully before joining to avoid uneven shelves. Using clamps can help hold pieces in place, making it easier to work with both hands.
Consider using wood glue along with mechanical fasteners for stronger joints. It might feel like extra work, but glue adds a lasting bond that screws or nails alone can’t provide. Have you noticed how sometimes a shelf wobbles because joints aren’t tight enough? Taking time here prevents that problem.
Using Screws And Nails
Screws are often better than nails for shelf frames because they grip wood more securely. Pick screws that are long enough to go through one piece and deep into the other without poking through the surface. Pre-drilling holes reduces the chance of wood splitting, especially near edges.
Nails can be used for temporary holds or when speed is important, but avoid relying on them alone. Using a combination of screws and finishing nails can save time and still keep your frame strong. Have you tried using a cordless drill? It speeds up the process and ensures screws go in straight.
Ensuring Stability
Check your frame for any wobbling or gaps after joining all pieces. Adding corner braces or metal L-brackets can significantly improve stability, especially for larger shelves. Don’t skip this step even if your frame feels solid—extra support is worth the effort.
Stand the frame upright and gently push from different angles. Does it shift or feel loose? Tighten screws or add additional supports as needed. Your shelf should feel like part of the wall, not something likely to fall off under pressure.
Finishing Touches
Finishing touches transform your wall shelf unit from a simple structure into a standout piece. These final steps protect your work and add personality. They make your shelf not only functional but also a beautiful part of your space.
Applying Paint Or Stain
Choosing the right paint or stain sets the tone for your shelf. Paint offers a bold, solid color that can match or contrast your room’s decor. Stain enhances the natural wood grain, giving a warm, rich finish that feels timeless.
Before applying, lightly sand the surface to ensure smoothness. Use a brush or foam roller for paint, and a cloth or brush for stain. Apply thin, even coats and let each dry fully. Have you considered how the color or stain will change the room’s mood?
Sealing For Durability
Sealing your shelf protects it from scratches, spills, and daily wear. Polyurethane is a common choice, offering a clear, tough layer. You can pick between matte, satin, or glossy finishes depending on your style.
Apply sealant with a clean brush, moving in the direction of the wood grain. Let each coat dry completely before adding another. This step is crucial if your shelf will hold heavy items or be placed in a humid area.
Adding Decorative Elements
Decorative touches bring your shelf to life and reflect your personality. Think about adding metal brackets, decorative knobs, or LED strip lights for a modern look. Even simple touches like stenciled patterns or washi tape can create unique charm.
Consider the room where the shelf lives—does it lean more rustic, industrial, or minimalist? Small additions can shift the style dramatically and make your project uniquely yours. What kind of statement do you want your shelf to make?

Credit: www.bunnings.com.au
Mounting The Shelf Unit
Mounting the shelf unit correctly is key to its strength and safety. A well-mounted shelf holds weight steadily and lasts longer. This process involves finding strong points in the wall, choosing the right supports, and fastening the shelf securely.
Finding Studs In The Wall
Studs are vertical wooden beams behind drywall. They provide the best support for heavy shelves. Use a stud finder tool to locate these beams. Move the tool slowly along the wall. Mark the edges of each stud with a pencil. Space between studs is usually 16 or 24 inches. Check twice to ensure accuracy.
Using Anchors For Support
Wall anchors help secure shelves when no studs are available. Choose anchors rated for the shelf’s weight. Types include plastic expansion anchors, toggle bolts, and molly bolts. Drill holes slightly smaller than the anchor size. Insert anchors firmly into the wall. Anchors spread the load and prevent the shelf from pulling out.
Securing The Shelf Safely
Hold the shelf unit against the wall at marked points. Use a level to keep the shelf straight. Drill pilot holes through the shelf’s mounting brackets into the wall. Screw in the screws tightly but avoid over-tightening. Check stability by applying gentle pressure. Adjust screws if the shelf feels loose.
Organizing And Styling
Organizing and styling your wall shelf unit can transform any room. It brings order and personality together. A neat shelf looks inviting and adds charm to your space. Proper arrangement helps you find items quickly. Stylish displays make your shelf a focal point.
Choosing Storage Baskets
Storage baskets keep small items tidy and hidden. Choose baskets that match your room’s color and style. Woven baskets add a natural touch. Fabric baskets offer softness and color variety. Use different sizes for versatility. Label baskets to know what is inside. Group baskets on shelves for a balanced look.
Arranging Books And Decor
Arrange books both vertically and horizontally for interest. Stack some books to create platforms for decor pieces. Place small plants or candles to add life and warmth. Keep heavier items at the bottom for stability. Use odd numbers of decor items for visual appeal. Leave some empty space to avoid clutter.
Maintaining The Shelf
Dust the shelf regularly to keep it clean. Wipe baskets and decor with a damp cloth. Check for loose screws or damage often. Rearrange items seasonally to refresh the look. Avoid overloading shelves to prevent sagging. Keep only what you need for a tidy shelf.
Frequently Asked Questions
What Materials Do I Need To Make A Wall Shelf Unit?
You need wood boards, brackets, screws, a drill, a level, and wall anchors. Choose wood type based on your style and strength needs. Quality brackets ensure stability. Proper tools help secure the shelf safely on the wall.
How Do I Measure Space For A Wall Shelf Unit?
Measure the wall width and height available for the shelf. Consider the shelf depth for your items. Use a tape measure and mark with a pencil. Accurate measurements prevent fitting issues and ensure balance.
What Is The Best Wood For Wall Shelves?
Pine, oak, and plywood are popular choices. Pine is affordable and easy to work with. Oak offers durability and a classic look. Plywood is strong and resists warping. Choose based on budget and style preference.
How Do I Securely Attach A Wall Shelf Unit?
Locate wall studs using a stud finder for strong support. Use appropriate screws and anchors for drywall. Level the shelf before securing. Proper attachment prevents accidents and holds heavier items safely.
Conclusion
Building a wall shelf unit can be simple and fun. You only need basic tools and materials. Follow the steps carefully to make a strong shelf. Take your time and measure twice before cutting. A well-made shelf adds space and style to any room.
Enjoy placing your books, plants, or decorations on it. Try different designs to fit your needs and taste. Making your own shelf gives pride and saves money. Start your project today and see the results for yourself.


