
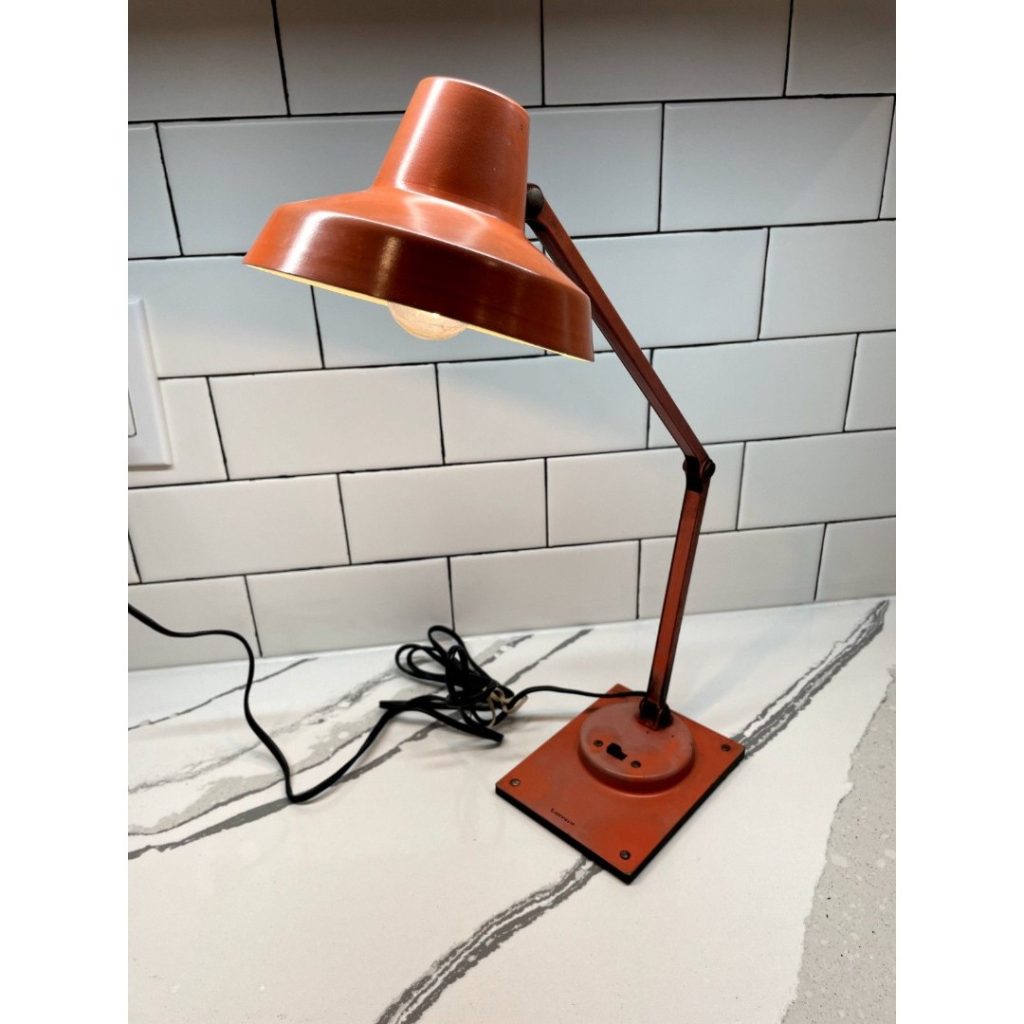
Your vintage Tensor desk lamp is more than just a light source—it’s a piece of history and style on your desk. But when the wiring starts to wear out, it can be frustrating and even unsafe to keep using it.
Don’t worry—you can bring your lamp back to life with a simple wiring replacement. In this guide, you’ll learn easy, step-by-step instructions that anyone can follow, even if you’ve never done electrical work before. Keep reading, and you’ll soon enjoy your classic lamp shining bright again, safe and sound.
Gather Tools And Materials
Before you begin replacing the wiring on your vintage Tensor desk lamp, gathering the right tools and materials is crucial. Having everything on hand will save you time and frustration. It also helps ensure you complete the job safely and effectively.
Essential Tools Needed
Start with basic electrical tools to make the process smoother. You will need:
- Screwdrivers(both flathead and Phillips) to open the lamp casing and remove screws.
- Wire strippersto safely strip insulation from the new wire ends.
- Multimeterto check for voltage and continuity before and after rewiring.
- Electrical tapeor heat shrink tubingto insulate wire connections.
- Pliersfor bending and securing wires.
Having these tools ready helps you avoid unnecessary trips to the hardware store. Do you already own some of these tools? If not, investing in good-quality versions will pay off for future projects.
Choosing The Right Replacement Wire
Not all wiring is created equal, especially for vintage lamps. You need wire that matches the lamp’s voltage and current requirements to avoid safety hazards.
Look for:
- Wire gauge:Typically, 18 or 20 gauge wire works well for desk lamps.
- Insulation type:Choose wire with heat-resistant insulation, like Teflon or PVC.
- Length:Make sure the wire is long enough to reach from the lamp base to the plug without strain.
Have you checked the original wire’s specifications? Matching these specs will keep your lamp functional and safe. Using the wrong wire might cause overheating or short circuits.
Prepare The Work Area
Preparing your work area is the foundation of a successful wiring replacement on your vintage Tensor desk lamp. A well-organized space not only makes the task easier but also keeps you safe. Before you start, take time to arrange your tools and clear distractions. This approach saves frustration and helps you focus on the delicate wiring work.
Safety Precautions
Safety should be your top priority. Unplug the lamp before touching any wires to avoid electric shock. If you’re unsure about any part of the process, consider using insulated gloves for extra protection.
Keep a fire extinguisher nearby just in case. Never work near water or in damp conditions. Think about the last time you rushed a repair—did you notice how small mistakes can cause big problems? Taking simple safety steps upfront can prevent those mistakes.
Setting Up A Clean Workspace
Choose a flat, well-lit surface where you can spread out all parts and tools. Use a tray or shallow box to hold tiny screws and components so they don’t get lost. A clean workspace helps you see what you’re doing clearly and keeps old wiring bits from mixing with new parts.
Arrange your tools within easy reach: wire strippers, screwdrivers, replacement wire, and electrical tape. Avoid clutter that might cause you to knock something over or lose a small piece. How much smoother would your work go if everything you need was right at your fingertips?
Disassemble The Lamp
Disassembling your vintage Tensor desk lamp is the key to safely and effectively replacing its wiring. Taking the lamp apart carefully helps you avoid damage to its delicate parts and ensures you have full access to the components that need attention. Let’s break down the process step-by-step, starting with the outer parts you’ll need to remove first.
Removing The Lampshade And Bulb
Begin by unplugging the lamp from any power source to keep yourself safe. The lampshade usually twists off or is held by small screws—check for these and loosen them gently.
Next, unscrew the bulb by turning it counterclockwise. Set the bulb aside in a safe place; you will need it later or might want to replace it if it’s old.
Have you noticed how some lampshades get stuck after years of use? A little patience and careful wiggling can prevent breaking fragile parts.
Accessing The Wiring
With the lampshade and bulb removed, you’ll see the lamp’s neck or housing that contains the wiring. Look for screws or clips that hold the neck or base together and remove them carefully.
Sometimes the metal housing is tight, so gently use a flathead screwdriver to pry it open without bending or scratching the finish.
Inside, you’ll find the wires connected to the socket and the power cord. Take note of how the wires are attached—taking a photo can help you remember the setup for reassembly.
Have you ever found tangled or frayed wires inside an old lamp? That’s a clear sign it’s time for replacement to prevent any electrical hazards.

Credit: www.ebay.com
Remove Old Wiring
Removing old wiring is a key step in restoring a vintage Tensor desk lamp. It ensures safety and prepares the lamp for new wiring. Careful removal helps avoid damage to the lamp’s parts. Take your time and follow each step closely.
Disconnecting The Plug
Begin by unplugging the lamp from the power source. This stops any electricity from flowing. Never work on the lamp while it is plugged in. Check the plug for any visible damage. Handle the cord gently to prevent fraying or breaking.
Detaching Wires From Socket And Switch
Locate where the wires connect to the socket and switch. Use a small screwdriver to loosen the screws holding the wires. Gently pull the wires free once the screws are loose. Keep track of each wire’s position for easier rewiring. Avoid pulling on the wires too hard to prevent damage.
Install New Wiring
Replace old wiring carefully to keep the vintage Tensor desk lamp safe and working. Cut power, remove old wires, and connect new ones following the lamp’s design. Test the lamp before use to ensure proper installation.
Replacing the wiring in a vintage Tensor desk lamp can bring new life to a beloved piece, making it safe and functional for everyday use. It’s a rewarding DIY project that requires patience and attention to detail. Whether you’re a seasoned DIY enthusiast or trying this for the first time, installing new wiring is a crucial step in the process. Here’s a guide to help you navigate this part of your lamp restoration journey.Threading New Wire Through Lamp
Begin by selecting the right type of wire. Ensure the wire is flexible enough to thread through the narrow channels of your lamp. A cloth-covered wire can add a vintage touch while offering durability. Start at the base of the lamp, gently feeding the wire through the existing channels. Use a guiding tool like a stiff wire or string to help direct it through bends and curves. Patience is key here—avoid forcing the wire to prevent damage.Connecting Wires To Socket And Switch
Once the wire is threaded through, it’s time to connect it to the socket. Strip about half an inch of insulation from the ends of the wire. This exposes the copper strands, which you’ll attach to the socket terminals. Carefully connect the neutral wire to the silver terminal and the hot wire to the brass terminal. This ensures your lamp functions safely and correctly. Tighten the screws to secure the wires in place. Next, connect the wires to the switch. Ensure the connections are snug and the wires are not frayed. Test the connections by gently tugging on the wires, ensuring they stay in place. Taking these steps with care ensures your Tensor desk lamp not only shines brightly but also safely. Are you ready to see your vintage lamp light up a new chapter in your home?
Credit: www.clinicabeautylounge.com
Reassemble The Lamp
Reassembling your vintage Tensor desk lamp is a crucial step after replacing the wiring. This process ensures that the lamp functions safely and looks great. Take your time to reconnect everything carefully. Correct reassembly prevents damage and keeps your lamp stable.
Securing The Wiring
First, make sure all wires are neatly arranged inside the lamp. Avoid tangling or pinching the wires. Use electrical tape or wire connectors to secure any exposed ends. Check that the wires do not touch metal parts that could cause shorts.
Fasten the wiring firmly to the lamp base or arm. Use small clips or ties to hold wires in place. This prevents movement and reduces wear over time. Double-check connections for tightness to avoid loose contacts.
Reattaching Lamp Components
Reattach the lamp parts in the reverse order of disassembly. Start with the socket, securing screws firmly but not too tight. Align the shade or reflector as it was originally. Make sure the switch is properly seated and functions smoothly.
Replace any decorative covers or plates last. Test the lamp by plugging it in before fully tightening all screws. This step confirms the wiring works and the lamp lights up safely. Adjust parts if needed, then complete the final tightening.
Test The Lamp
Testing your vintage Tensor desk lamp after rewiring is crucial to ensure everything works safely and effectively. This step lets you catch any wiring issues before plugging it in fully. Taking your time here protects both you and your lamp from electrical hazards.
Checking Electrical Connections
Start by visually inspecting all your wire connections. Are the wires tightly twisted together or firmly secured with wire nuts? Loose connections can cause flickering or short circuits.
Use a multimeter to test continuity between the switch, plug, and bulb socket. This confirms your wiring path is complete and correct. If the meter doesn’t show continuity, double-check your wiring for breaks or incorrect joins.
Remember, even a small loose wire can cause the lamp to fail or create a fire risk. Have you ever experienced a lamp that only works when you wiggle the cord? That’s a sign of a bad connection you want to avoid.
Ensuring Safe Operation
Once the connections check out, plug the lamp into a ground-fault circuit interrupter (GFCI) outlet. This adds a layer of protection against electrical shocks while testing. Turn the lamp on and off several times to see if it powers up reliably.
Check the lamp for any unusual smells or sounds like buzzing or crackling. These could indicate hidden wiring problems. If you notice anything odd, unplug the lamp immediately and reassess your work.
Also, inspect the bulb socket for heat after running the lamp for a few minutes. Excessive heat might mean the wiring is overloaded or the bulb wattage is too high. Are you using the correct bulb recommended for the vintage lamp? This simple detail affects safety.

Credit: www.ebay.com
Tips For Maintenance
Maintaining your vintage Tensor desk lamp ensures it stays safe and functional. Regular care helps prevent electrical issues and preserves its classic look. Follow simple tips to keep your lamp in good shape and enjoy its warm glow for years.
Regular Inspection
Check the lamp’s wiring and plug often for damage or wear. Look for frayed cords, loose connections, or exposed wires. Test the switch and bulb holder to ensure they work smoothly. Early detection of problems prevents bigger repairs later. Unplug the lamp before inspecting it to stay safe.
Extending Lamp Life
Use the correct wattage bulb recommended for your lamp. Avoid using bulbs with higher power than suggested. Clean the lamp gently with a soft cloth to remove dust and dirt. Keep the lamp away from moisture and extreme heat. Store it in a dry place if not in use. Replace old wires with quality parts to avoid electrical hazards.
Frequently Asked Questions
How Do I Safely Replace Wiring On A Tensor Desk Lamp?
First, unplug the lamp. Remove the old wiring carefully. Use matching gauge wire. Follow wiring diagrams. Reassemble and test the lamp for safety and function.
What Tools Are Needed To Rewire A Vintage Tensor Lamp?
You need a screwdriver, wire cutters, wire strippers, electrical tape, and replacement wire. A voltage tester is helpful for safety checks.
Can I Use Modern Wiring For A Vintage Tensor Lamp?
Yes, modern wiring is compatible if it matches the original wire gauge and voltage rating. Use UL-listed materials for safety and durability.
How Long Does Rewiring A Tensor Desk Lamp Usually Take?
Rewiring typically takes 30 to 60 minutes, depending on your experience and lamp condition. Take your time for accuracy and safety.
Conclusion
Replacing wiring on a vintage Tensor desk lamp is simple with the right steps. Take your time and follow each part carefully. Always use safe tools and check the lamp before plugging it in. This repair brings new life to your old lamp.
Enjoy the warm light and classic style once again. Keep your workspace bright and safe with fresh wiring. Small fixes like this save money and reduce waste. You can do it!


