
Wiring a multi-light chandelier may seem tricky, but with the right guidance, you can do it yourself and save time and money. Imagine the warm glow of your new chandelier lighting up your room, adding style and charm.
This guide will walk you through each step clearly and simply, so you feel confident and in control. Ready to transform your space and impress your guests? Let’s get started and make your chandelier wiring easy and safe.
Choosing The Right Chandelier
Choosing the right chandelier sets the foundation for a successful wiring project. The perfect chandelier balances design, size, and lighting needs. This choice affects the room’s mood and functionality. Understanding different types and features helps make a smart selection. The right bulbs complete the setup, ensuring safety and efficiency.
Types Of Multi Light Chandeliers
Multi light chandeliers come in various styles and shapes. Popular types include:
- Traditional chandeliers with crystal or metal arms
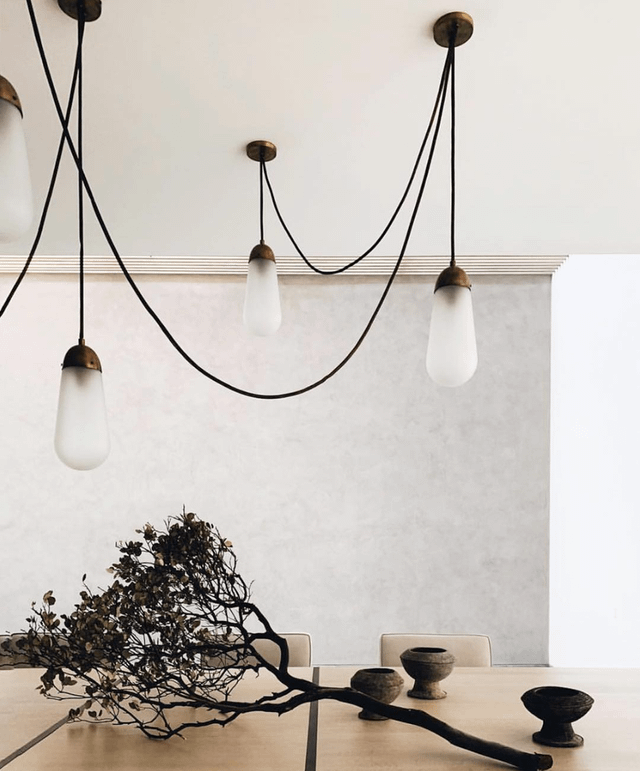
- Modern designs featuring sleek lines and minimalism
- Rustic chandeliers made from wood or wrought iron
- Industrial styles with exposed bulbs and metal finishes
- Drum chandeliers with fabric shades around multiple lights
Choose a type that matches your room’s theme and personal taste.
Considerations For Size And Style
Size matters for both function and appearance. A chandelier too large overwhelms the space. One too small looks out of place. Measure your room’s dimensions and ceiling height first. Consider the table or floor area the chandelier will hang over. Style should complement furniture and decor. Think about color, material, and shape. Balance is key for a harmonious look.
Selecting Compatible Bulbs
Bulbs affect brightness, energy use, and longevity. Check the chandelier’s bulb base type. Common bases include E12, E14, and E26. Choose bulbs with the right wattage to avoid damage. LED bulbs save energy and last longer. Dimmable bulbs add flexibility to lighting moods. Match bulb color temperature to room ambiance—soft white for warmth, daylight for brightness.

Credit: www.amazon.co.uk
Gathering Tools And Materials
Before you begin wiring your multi light chandelier, collecting the right tools and materials is crucial. Having everything ready saves time and prevents frustration. It also ensures your work is safe and effective.
Essential Wiring Tools
- Wire Strippers:These help you remove insulation without damaging the wires.
- Screwdrivers:Both flathead and Phillips screwdrivers are needed to handle different screws.
- Voltage Tester:This tool confirms that the power is off before you start working.
- Needle-Nose Pliers:Useful for bending wires and reaching tight spots.
- Wire Nuts:These secure wire connections safely.
Have you ever tried to twist wires without wire nuts? It’s risky and can cause shorts. Using the right tools makes your job precise and safe.
Safety Equipment
- Insulated Gloves:Protect your hands from shocks and sharp edges.
- Safety Glasses:Shield your eyes from sparks or debris.
- Dust Mask:Useful if you’re working in dusty areas or old fixtures.
- Non-slip Shoes:Keep your footing steady on ladders or uneven surfaces.
Safety gear isn’t just a suggestion; it’s a necessity. Have you ever underestimated the importance of gloves? One small slip can lead to injury.
Additional Supplies
- Electrical Tape:Wrap exposed wire ends for extra protection.
- Mounting Bracket:Make sure your chandelier has a secure base for installation.
- Wire Connectors:Sometimes different sizes or types are needed depending on your wiring.
- Light Bulbs:Check the correct wattage and type before buying.
- Ladder or Step Stool:Essential for reaching ceiling fixtures safely.
Think about your workspace. Is your ladder sturdy enough? Using the right additional supplies can make installation smoother and avoid unexpected problems.
Preparing The Electrical Box
Ensure the power is off before opening the electrical box. Check that the box is sturdy and large enough for the chandelier wiring. Clear any debris and organize wires for easy connection.
Preparing the electrical box is a crucial step in wiring a multi-light chandelier. This ensures safety and functionality. Start by gathering necessary tools and equipment. A screwdriver, wire strippers, and voltage tester are essential. Make sure everything is within reach. This preparation makes the process smooth and efficient.Turning Off Power Safely
Ensure safety by turning off the power. Locate your home’s main electrical panel. Flip the switch corresponding to the chandelier’s circuit. Use a voltage tester to confirm no power is flowing. This step prevents accidents during installation.Removing Old Fixtures
Remove any existing fixtures from the electrical box. Unscrew and detach the fixture from the ceiling. Carefully handle wires, noting their connections. This helps during the new chandelier installation. Ensure all components are safely removed. This clears space for the new chandelier.Inspecting Wiring Conditions
Inspect the existing wiring conditions thoroughly. Look for any frayed or damaged wires. Ensure the wires are in good condition for safe use. If any wires appear worn, consider replacing them. Check the electrical box for stability. Make sure it can support the weight of the chandelier. Proper inspection ensures a secure and safe installation.Wiring The Chandelier
Wiring a multi light chandelier might seem complex at first, but breaking it down into clear parts makes it manageable. Understanding the wires and how they connect is crucial for safety and function. Let’s dive into the essentials of wiring your chandelier correctly.
Identifying Wires And Connections
Start by examining the wires coming from both the chandelier and your ceiling. Usually, you’ll find three types of wires: live (often black or red), neutral (white), and ground (green or bare copper). Make sure to check your chandelier’s manual since wire colors can sometimes vary.
Have you ever grabbed the wrong wire and caused a spark? Identifying each wire correctly prevents that risk and ensures your chandelier works without a hitch. Use a voltage tester to confirm which wire is live before proceeding.
Connecting Ground, Neutral, And Live Wires
The ground wire is your safety net—it directs any unwanted electricity safely into the earth. Connect the chandelier’s ground wire to the ceiling’s ground wire or grounding screw. This step is non-negotiable for safety.
Next, join the neutral wires together. These complete the electrical circuit and are usually white. Finally, connect the live wires, which provide the power to your chandelier. Twist the wires together firmly, making sure no copper strands are exposed.
Securing Wire Nuts And Insulation
Once wires are connected, cap each connection with a wire nut that fits snugly. Give each nut a gentle tug to ensure it’s secure. Loose wire nuts can cause flickering lights or worse, electrical hazards.
Wrap electrical tape around the wire nuts and wires for added protection. This helps prevent any accidental contact with metal parts or the ceiling box. Think of this as your final checkpoint before flipping the power back on.
Mounting The Chandelier
Mounting a multi light chandelier is a crucial step that sets the foundation for both safety and style. Getting this part right ensures your fixture hangs securely and looks stunning. Let’s break down the key actions you’ll need to take to mount your chandelier properly.
Attaching The Mounting Bracket
Start by securing the mounting bracket to the electrical box in your ceiling. Use the screws provided with your chandelier kit, making sure they fit tightly and the bracket feels solid. A loose bracket can cause your fixture to wobble, which is both unsafe and annoying over time.
Check that the bracket aligns well with the chandelier’s base plate. If the bracket is adjustable, position it so the chandelier will hang straight. This small step can save you from awkward angles later.
Hanging The Fixture Safely
Before lifting the chandelier, ask yourself: do I have a helper? Having an extra pair of hands can prevent accidents and make the process smoother. Carefully lift the chandelier and hook it onto the mounting bracket.
Many chandeliers come with a safety chain—make sure to connect it as a backup support. This chain acts like a safety net if the main mounting fails. Always double-check the fixture’s stability before moving on to wiring.
Adjusting Height And Position
Once the chandelier is hanging, you might need to adjust its height. Most fixtures use adjustable rods or chains—slide or add links to reach your desired level. Think about the room’s size and furniture below to pick a height that’s functional and visually balanced.
Also, check the fixture’s position to ensure it’s centered over tables or open spaces. A small tilt or shift can affect the room’s overall look. Take your time here; a perfectly positioned chandelier makes a big difference in how your space feels.

Credit: ledsone.co.uk
Testing And Troubleshooting
Testing and troubleshooting your multi-light chandelier wiring is crucial to ensure safety and functionality. Skipping this step can lead to flickering lights, non-working bulbs, or even electrical hazards. Taking the time to carefully check your work and fix issues will save you frustration and keep your chandelier shining bright.
Restoring Power And Testing Lights
Before testing, make sure all your wiring connections are secure and insulated. Then, restore power by switching on the circuit breaker or fuse. Watch closely as the lights come on; this first moment reveals a lot about your wiring’s success.
If any bulbs don’t light up, don’t panic. Sometimes, the problem is as simple as a loose bulb or a faulty socket. Test each bulb individually by swapping it with one you know works.
Common Wiring Issues
Many wiring problems come from simple mistakes like reversed polarity, loose connections, or incorrect wire matching. If your chandelier has multiple light arms, a single loose wire can cause multiple bulbs to fail.
Check for:
- Loose wire nuts or connectors
- Wires connected to the wrong terminals
- Damaged insulation exposing wires
- Incorrect grounding
Using a voltage tester or multimeter can help you pinpoint where the power stops flowing. Have you ever found a wire that looked fine but tested dead? Tools make a difference.
Fixing Flickering Or Non-working Bulbs
Flickering lights often indicate a poor connection or a bulb that doesn’t fit properly. Start by gently tightening the bulbs. If flickering continues, look at the sockets for corrosion or damage.
Non-working bulbs can be caused by:
- Burnt-out bulbs
- Faulty sockets
- Wiring errors
If you’ve confirmed the bulbs are good, try replacing the socket or redoing the wire connections. Sometimes, a small fix like re-striping the wire ends or changing the wire nuts can restore full function.
Have you experienced a flickering light that turned out to be a simple wiring fix? That moment when a quick adjustment solves the issue feels like a win worth sharing.
Enhancing Your Lighting
Enhancing your lighting goes beyond simply wiring your multi light chandelier. It’s about creating the perfect atmosphere and adding functionality that suits your lifestyle. Small adjustments can make a big difference in how your space feels and looks.
Using Dimmer Switches
Adding a dimmer switch gives you control over your chandelier’s brightness. You can easily shift from bright task lighting to a soft, cozy glow. This flexibility helps you set the right mood for different occasions without changing bulbs.
Think about how often you need adjustable lighting. Installing a dimmer is a simple upgrade that can improve energy efficiency and extend bulb life. Plus, it’s a smart way to customize your space without extra fixtures.
Choosing Light Shades And Covers
Light shades and covers influence both the style and the quality of your chandelier’s light. Clear glass shades offer bright, direct light, while frosted or fabric covers soften it for a more relaxed vibe. The material and color you choose can change the entire feel of the room.
Consider the décor and purpose of your space before selecting shades. For example, a dining room might benefit from warm-toned covers that create a welcoming atmosphere. You can even mix and match shades to add personality and depth.
Maintaining Your Chandelier
Regular maintenance keeps your chandelier looking great and working efficiently. Dust and grime can dull the light and affect performance. Cleaning your chandelier every few months ensures it stays bright and beautiful.
Check for loose connections or worn wiring during maintenance. These small issues can turn into bigger problems if ignored. Taking care of your chandelier protects your investment and keeps your home safe.

Credit: www.reddit.com
Frequently Asked Questions
How Do You Wire A Multi Light Chandelier Safely?
To wire a multi light chandelier safely, turn off power first. Connect the ground wire, then match the neutral and live wires. Secure connections with wire nuts and use electrical tape for extra safety. Always follow the manufacturer’s instructions and local electrical codes.
What Tools Are Needed To Wire A Chandelier?
You need a voltage tester, wire strippers, screwdrivers, wire nuts, and electrical tape. A ladder and pliers may also help. These tools ensure safe and efficient wiring of your multi light chandelier.
Can I Wire A Chandelier Without Professional Help?
Yes, if you have basic electrical knowledge and follow safety rules. Turn off power and use a voltage tester before starting. If unsure, consult a professional to avoid hazards or code violations.
How Do I Identify Chandelier Wires For Correct Installation?
Typically, black or red wires are live, white is neutral, and green or bare is ground. Confirm with a voltage tester. Proper identification ensures safe and correct wiring of your chandelier.
Conclusion
Wiring a multi light chandelier can seem tricky, but it is doable. Take your time and follow each step carefully. Always turn off the power before starting any work. Use the right tools and double-check all connections. Safety matters most in electrical projects.
With patience and care, you can install your chandelier successfully. Enjoy the new light and style it brings to your room. Keep learning and practicing for better skills next time.


